Welcome to the Sensi Thermostat Installation Manual․ This guide helps you install and configure your Sensi smart thermostat for optimal performance and energy efficiency․ Designed for both homeowners and professionals, it ensures a seamless setup process․ Follow the steps carefully to enjoy smart temperature control and advanced features․
1․1 Overview of the Sensi Thermostat
The Sensi Thermostat is a Wi-Fi-enabled, programmable smart thermostat designed for energy efficiency and convenience․ It offers advanced features like scheduling, geofencing, and remote access through the Sensi app․ Compatible with most HVAC systems, it provides precise temperature control and integrates seamlessly with smart home systems․ Its user-friendly interface and robust functionality make it a popular choice for modern homes seeking comfort and energy savings․
1․2 Importance of the Installation Manual
The installation manual is essential for proper setup and operation of the Sensi Thermostat; It provides step-by-step instructions, ensuring a safe and efficient installation process․ The manual covers compatibility checks, wiring guidelines, and troubleshooting tips, helping users avoid common errors․ By following the manual, you can optimize the thermostat’s performance, prevent potential damage, and enjoy all its smart features․ Referencing the manual ensures a smooth installation experience for both DIY enthusiasts and professionals․
System Requirements and Compatibility
The Sensi Thermostat is compatible with most HVAC systems and requires a stable Wi-Fi connection․ Ensure your system meets the specified requirements for optimal performance and connectivity․
2․1 HVAC System Compatibility
The Sensi Thermostat is designed to work seamlessly with most standard HVAC systems, including forced air, heat pumps, and dual-fuel systems․ It supports both 24V and 24mV systems, ensuring compatibility with a wide range of heating and cooling setups․ Before installation, verify that your system matches the voltage and configuration requirements outlined in the manual to ensure proper functionality and avoid any potential issues during setup․
2․2 Wi-Fi Network Requirements
The Sensi Thermostat requires a stable internet connection to function properly․ Ensure your Wi-Fi network operates on the 2․4 GHz band, as the thermostat is not compatible with 5 GHz networks․ A strong and reliable signal is essential for seamless communication between the thermostat and the Sensi app․ During installation, you will need to connect the thermostat to your Wi-Fi network using the app․ Proper network configuration ensures remote access, scheduling, and automation features work effectively․

Downloading and Preparing the Sensi App
Download the Sensi app from the App Store (iOS) or Google Play Store (Android)․ Create a Sensi account to access advanced features and remote control functionality․
3․1 Steps to Download the Sensi App
Open the App Store (for iOS devices) or Google Play Store (for Android devices)․ Search for “Sensi App” and select it from the search results․ Tap “Get” or “Install” to begin the download․ Once installed, open the app and create a Sensi account by providing your email address and choosing a password․ This account is essential for accessing smart features and remote control of your thermostat․
3․2 Creating a Sensi Account
Launch the Sensi app and tap “Create Account” on the welcome screen․ Enter a valid email address and choose a strong password․ Fill in additional details like your name and location if prompted․ Review and agree to the terms of service․ Tap “Sign Up” to complete the process․ A confirmation email will be sent to your inbox․ Open it and click the verification link to activate your account, enabling full access to app features․
Installation Steps
Prepare the installation site by turning off power to the HVAC system․ Safely remove the old thermostat and mount the new Sensi thermostat․ Follow the in-app instructions carefully to ensure a correct and secure installation․ This step is crucial for the proper functioning of your smart thermostat․
4․1 Preparing the Installation Site
Before installing your Sensi thermostat, ensure the installation site is ready․ Turn off the power to your HVAC system at the circuit breaker․ Remove the old thermostat and clean the wall area․ Label the wires to identify their functions, and ensure all necessary tools are available․ This preparation ensures a smooth and safe installation process for your new Sensi thermostat․ Follow the Sensi app instructions for guidance․
4․2 Removing the Old Thermostat
To remove the old thermostat, first switch off the power to your HVAC system at the circuit breaker․ Verify the system is off before proceeding․ Gently pull the thermostat away from the wall to access the wires․ Carefully disconnect the wires from the old thermostat and label them for reference․ Remove any screws or clips holding the thermostat in place․ Detach the thermostat from the wall and set it aside․ Properly dispose of the old thermostat and prepare for the new installation․
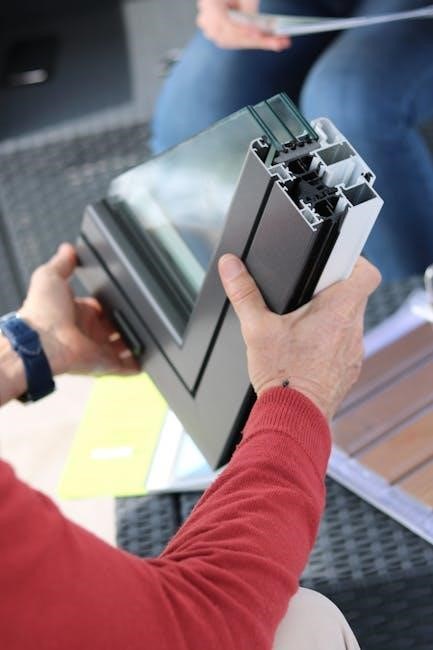
4․3 Mounting the Sensi Thermostat
Mount the Sensi thermostat by first ensuring the wall is clean and dry․ Use the provided screws and wall anchors to secure the thermostat base to the wall․ Align the thermostat with the wires and gently push it onto the base until it clicks․ Make sure the device is level and firmly attached․ Insert the wires into the terminal connectors and tighten the screws securely․ Refer to the Sensi app for further configuration instructions; If unsure, consult the installation manual for guidance․

Wiring and Connections
Connect the wires to the appropriate terminals on the Sensi thermostat, ensuring secure and correct connections․ Refer to the terminal cross-reference guide for accurate wiring configuration․ Always turn off power before handling wires to avoid electrical hazards․ Double-check all connections to ensure proper system functionality and safety․ If unsure, consult the installation manual or contact a licensed electrician for assistance․
5․1 Identifying and Connecting Wires
Identify the wires from your HVAC system and match them to the corresponding terminals on the Sensi thermostat․ Refer to the terminal cross-reference guide for proper connections․ Typically, wires are labeled as Rh, W, Y, G, C, and Rc․ Ensure each wire is securely connected to the correct terminal to avoid malfunctions․ Turn off the power to the HVAC system before handling any wires․ Double-check connections for accuracy․ If unsure, consult the installation manual or contact a licensed electrician for assistance․ Proper wiring ensures safe and efficient thermostat operation․
5․2 Terminal Cross Reference
Use the terminal cross-reference guide to ensure compatibility between your HVAC system and the Sensi thermostat․ Match the wires from your old thermostat to the corresponding terminals on the Sensi unit․ Common connections include Rh (heating power), W (heat stage), Y (cooling stage), G (fan), C (common), and Rc (cooling power)․ Refer to the chart in the manual for specific wire assignments․ Proper terminal alignment is crucial for correct functionality․ If your system uses a jumper wire, ensure it is correctly positioned․ Double-check all connections before powering on the system to avoid errors or damage․
Connecting to Wi-Fi
Open the Sensi app, select your thermostat, and enter your Wi-Fi network password․ Follow the in-app instructions to complete the connection․
- Ensure your network is 2․4 GHz․
- Restart your router if issues arise․
6․1 Configuring Wi-Fi Settings
Open the Sensi app and select your thermostat to begin Wi-Fi setup․ Choose your network from the list, enter the password, and follow the app’s prompts․
Ensure your router is on the 2․4 GHz band, as the Sensi thermostat does not support 5 GHz networks․
If prompted, grant location access to enable geofencing features․
Once connected, the thermostat will confirm the link and synchronize settings for remote control and automation․
6․2 Troubleshooting Wi-Fi Connection Issues
If your Sensi thermostat fails to connect to Wi-Fi, restart both the thermostat and your router․
Ensure your Wi-Fi password is correct and your network is on the 2․4 GHz band․
Check for firmware updates in the Sensi app․
If issues persist, reset the thermostat by removing it from the wall plate for 30 seconds․
Contact Sensi support for further assistance if the problem remains unresolved․
Final Setup and Configuration
Complete the setup by configuring scheduling, automation, and geofencing features in the Sensi app․ These settings ensure efficient energy use and personalized comfort preferences․
7․1 Scheduling and Automation Features
Use the Sensi app to create custom schedules and automate your thermostat settings․ Set temperature preferences for different times of the day or week․ Enable geofencing to adjust temperatures based on your location․ The app also offers smart automation features that learn your preferences over time, optimizing energy use and comfort․ These features ensure your home is always at the right temperature while saving energy when you’re away․
7․2 Geofencing and Remote Access
Geofencing allows your Sensi thermostat to detect your location and automatically adjust temperatures when you leave or arrive home․ This feature optimizes energy use and ensures comfort․ Remote access via the Sensi app lets you control your thermostat from anywhere, using your smartphone or tablet․ Receive notifications and adjust settings in real-time, offering unparalleled convenience and energy efficiency․ Geofencing and remote access work together to enhance your smart home experience and save on energy costs year-round․
With the Sensi thermostat properly installed and configured, you’ve unlocked advanced features like geofencing, remote access, and energy-saving schedules․ Regular app updates ensure optimal performance․ For any issues, refer to troubleshooting guides or contact Sensi support․ Enjoy enhanced comfort, convenience, and energy efficiency with your smart thermostat․ This concludes the installation manual; happy heating and cooling!